No. By default we print to the edge of the paper and trim to the exact size you order, with no bleed, white border or spare paper margin. Order a 40 × 50 cm print and you receive a 40 × 50 cm sheet with the image running to the edges. If you want a border, add it with the border tool when you order, or build it into your file.
Add a border when you order
The Borders card comes after the Print Size card when you configure a print at order.creativehub.io, so you do not need Photoshop to add white space. Border size offers:
- None: the image fills the print size.
- Small or Large: preset widths that scale with the print size. A Distribution option sets them Even all round or Bottom weighted, with a deeper margin at the bottom.
- Custom: your own widths for the top, right, bottom and left. The smallest border you can type is 10 mm.
The preview shows the border as you set it, and the size readout gives both the image size and the overall paper size. For advice on proportions, see How big should I make the borders on my fine art prints?
Does the border make the print bigger?
That depends on Set the size of on the size card:
- My image (the default): the image prints at exactly the size you typed and the border goes around it, so the sheet grows.
- Final paper: the size you typed is the finished sheet and the border sits inside it, so the image is smaller. Use this when the finished sheet has to be an exact size.
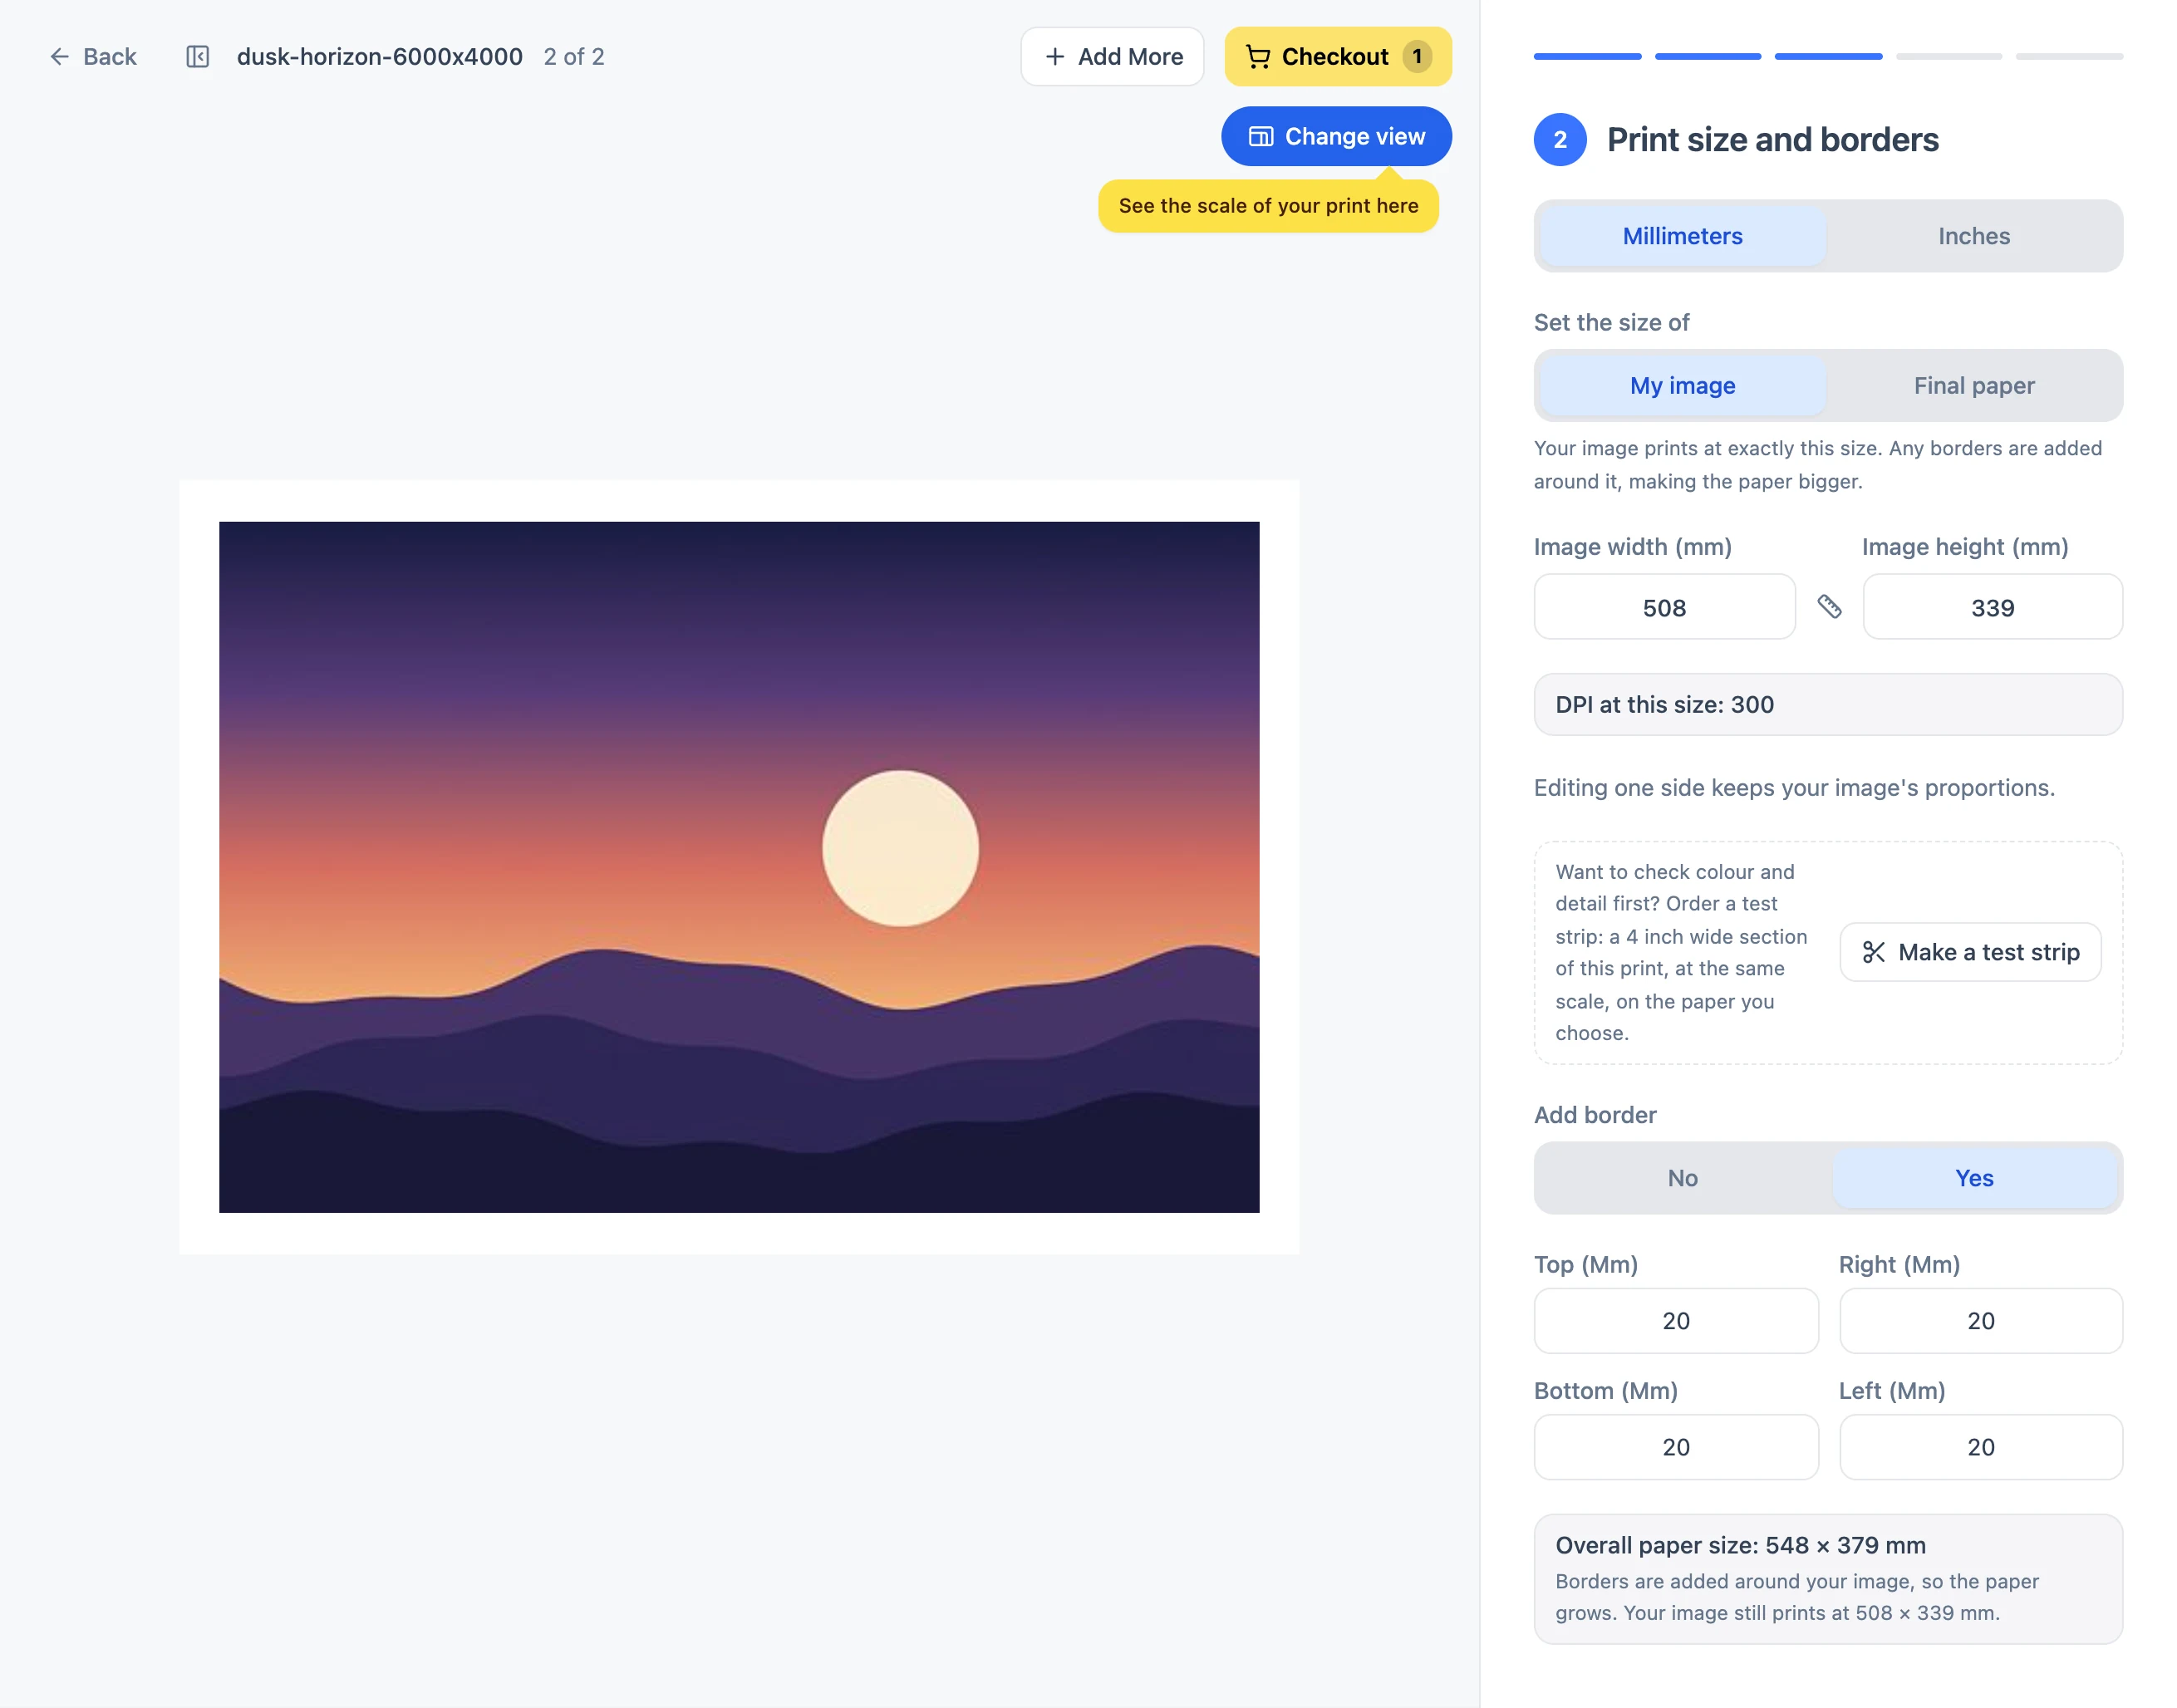
There is no separate charge for a border. The price follows the paper size, which is shown in the basket and on the price list. A border does not change the resolution of the image area; only the sheet size changes.
Build the border into your file
Set your document to the full finished sheet size, place the image inside it with the white margin around it, and order with Border size set to None. The size you order is then the finished sheet, border included. Use this method when you want:
- A border narrower than 10 mm. Prints are trimmed by hand, which is why the tool's minimum is 10 mm. A 4 or 5 mm border has to be in the file. Crop marks are not needed.
- A coloured or black border. The borders we add are the paper itself, so they are white. A colored border built into the file is printed as part of the image. For a dark surround, a window mount or a black frame is the other route.
A window mount is one of four kinds of mounting compared in our guide to what a mounted print is.
Allow for hand trimming
Every print is trimmed to size by hand, with a tolerance of 1.5 mm on each side. Keep signatures, captions, fine keylines and other critical detail a few millimetres in from the edge, or allow 1 to 2 mm of extra border around them. No bleed is needed: supply the image at the exact print size.
Borders and framing
- Framed or mounted by us: you do not need to add a handling margin. Printing and framing are produced as one job, so order the image, and any visible border you want, at the size you would like to see it.
- Box frame with a spacer: no border is needed. Our framers frame to the image edge without cropping, and the spacer sits outside the image.
- Framed elsewhere: decide on the border before you order. If your framer needs a margin to hinge or mount the print, build it into the file, and so into the size you order.
Preparing the file and choosing a print size are covered in our guide on making prints of your art.
If the border looks uneven
An equal border value gives an even border only when the image is the same shape as the sheet. See Why was my print cropped, or the border uneven?
If the border is there to set the print off in a frame, our online framing service shows the window mounts and mouldings to pair with it.