Follow the 7 easy steps to automate your art sales with creativehub & Squarespace.
Step 1: Sign up for your free creativehub account
Sign up for your creativehub account here. If you already have an account, simply login.

Step 2: Upload files and apply settings in your creativehub account
- Once logged in to your creativehub account, you’ll land on an option page.
- Choose the ‘Sell art online’ card and follow the quick tutorial to set up your products.

Step 3: Create your store on Squarespace
- Go to Squarespace to sign up for an account and choose your subscription plan. Our integration will work with any plan that has the commerce feature i.e a shop.
- Once you have created your account, choose a template and design your store. Squarespace offers a wealth of templates with a focus on e-commerce.
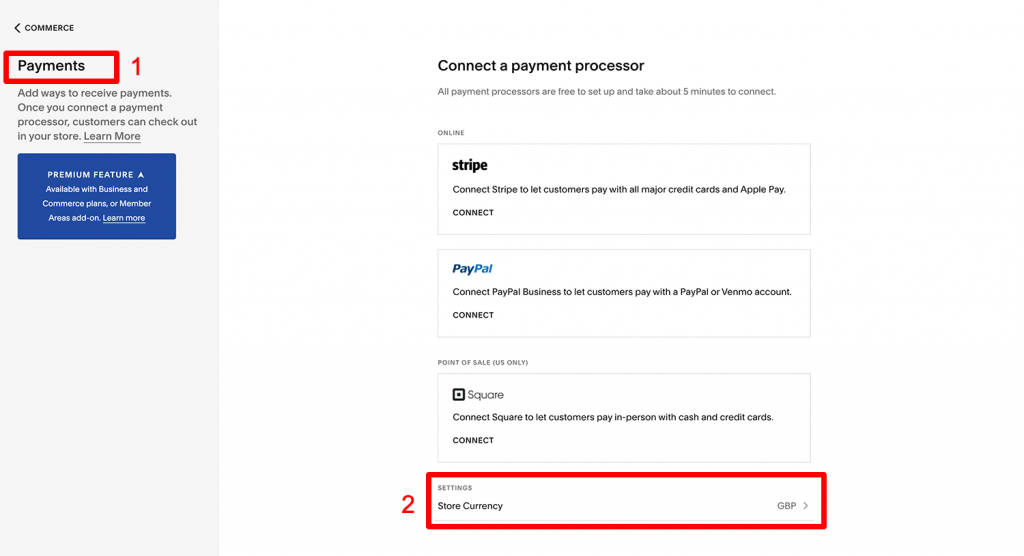
- Next, select your desired store currency and measurement preferences – this will ensure we import your products with the desired values.
- To choose measurements preferences, from your main Squarespace menu select: ‘Settings’ > ‘Language & region’ > ‘Measurement standard’

- To choose store currency preferences, from your main Squarespace menu select: ‘commerce’ > ‘payments’ > ‘store currency’
Step 4: Connect your creativehub store with Squarespace
- Navigate back to your creativehub account.
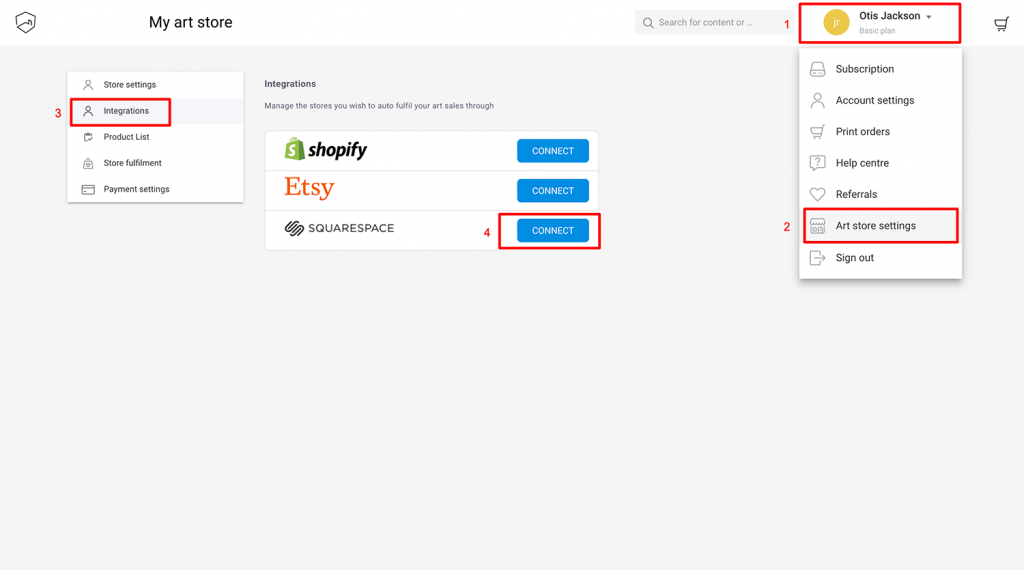
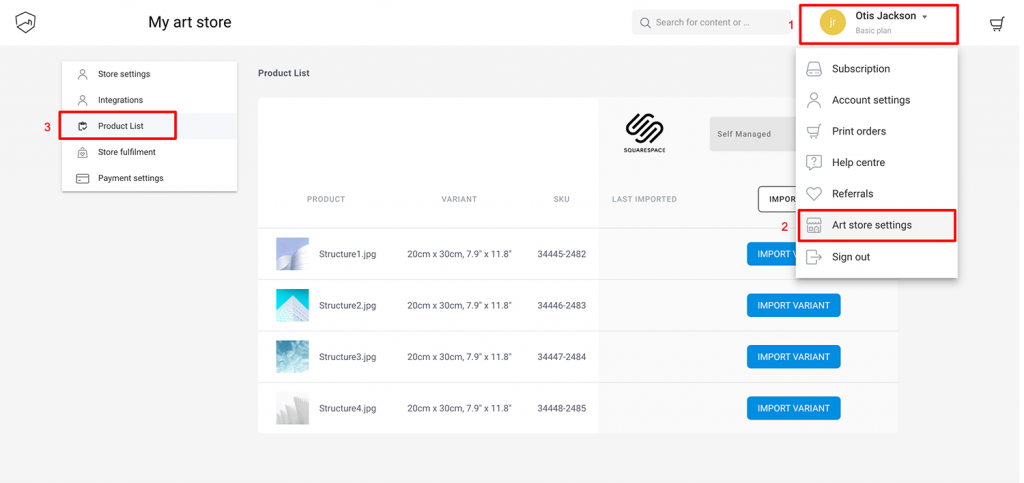
- Access your main setting menu by clicking your name/avatar in the top right
- Next, select ‘Art store settings’ from the drop down
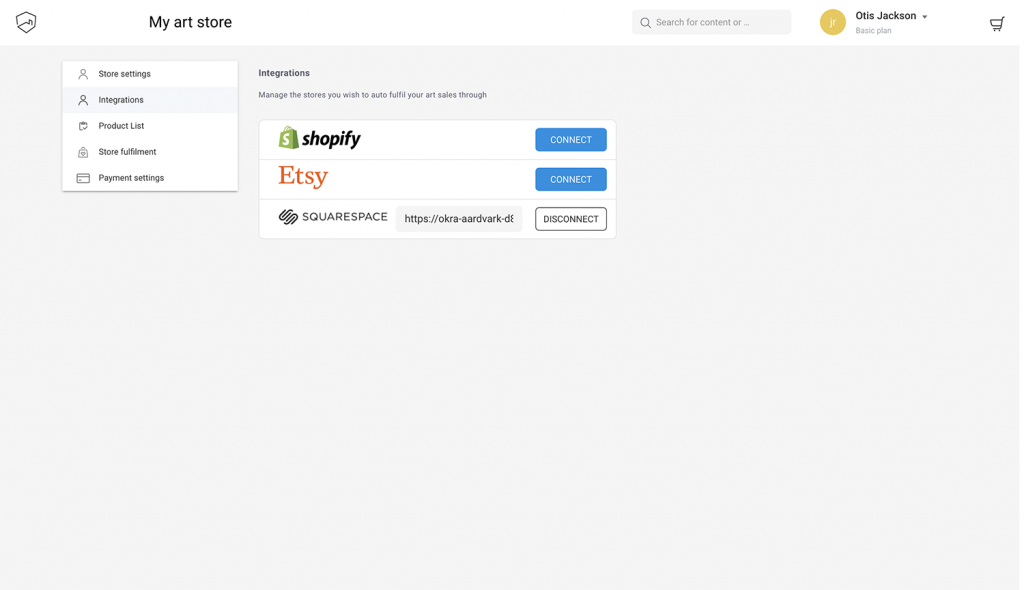
- Go to ‘Integrations’ from the left hand side menu options
- Click the ‘Connect’ button next to the Squarespace logo
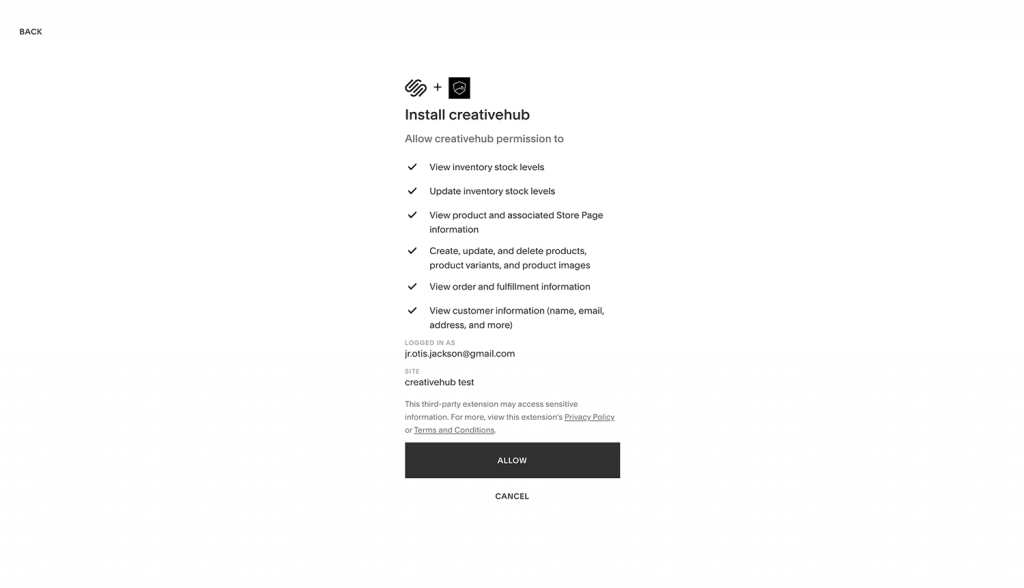
- Clicking ‘Connect’ takes you to a Squarespace page where you are asked if you would like to connect your store with creativehub. Authorise this connection.
- Once connected, you’ll be auto directed back to your creativehub account. Notice Squarespace now displays as connected.
Step 5: Import creativehub products to your Squarespace store
- Once your prints are priced (step 2), these will be listed in your creativehub account in the ‘Product list’
- This is located in ‘Art store settings’ > ‘Product list’
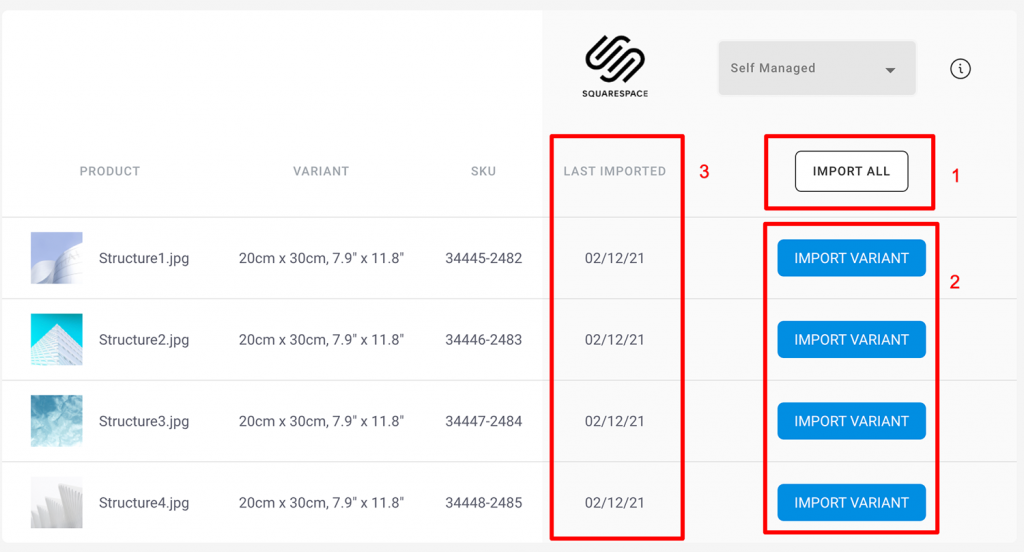
- Next, click ‘Import all’ if you wish to push all your products to Squarespace. Alternatively, import products individually. Read this help article for more detailed information regarding your product import options.
- Once imported, you’ll see the import date in the ‘last imported’ column.
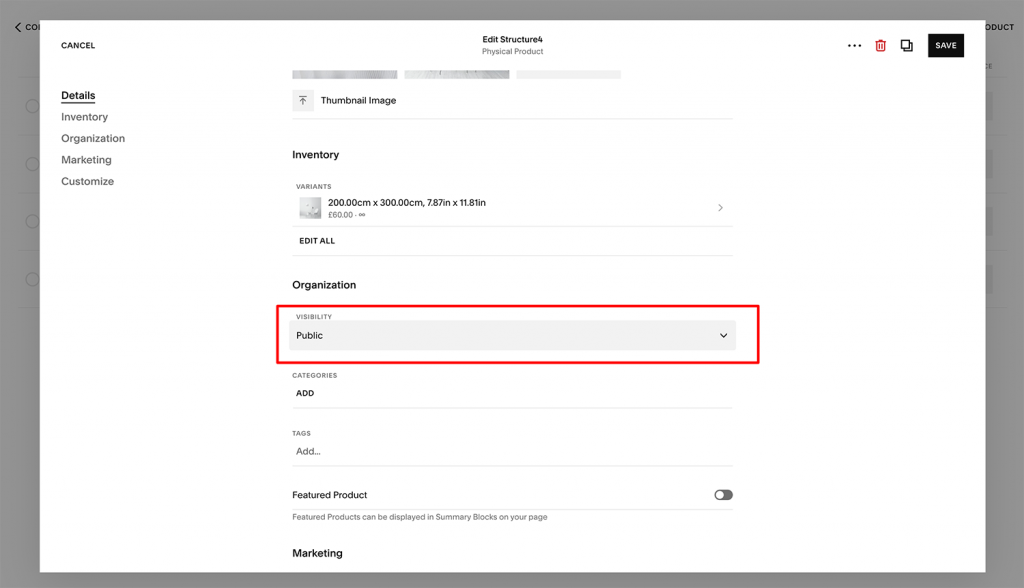
- Your imported products can be found in your Squarespace account by selecting ‘Commerce’ > ‘Inventory’.
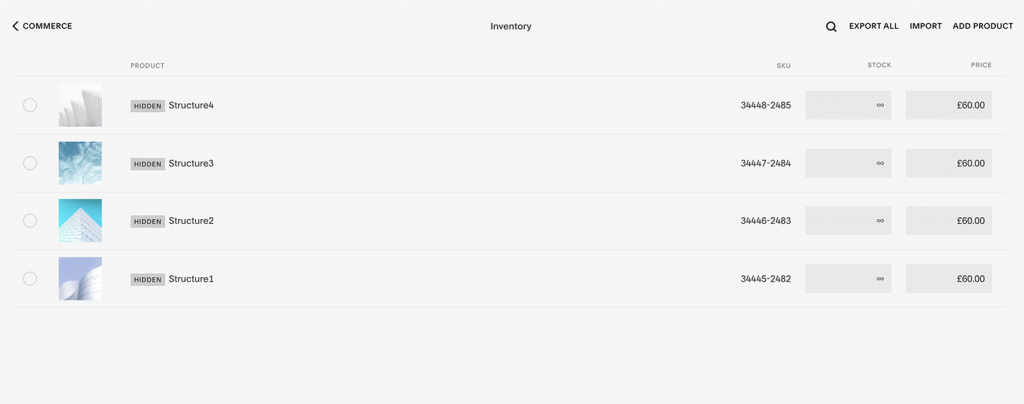
- To list your product for sale, click the product name, then change the ‘visibility’ from ‘hidden’ to ‘public’.
Step 6: Add a payment card to enable order fulfillment
When you sell a print in your Squarespace store, the customer pays you the full amount via your chosen payment method (this is configured in Squarespace main settings).
We then debit you separately for the production & shipping costs.
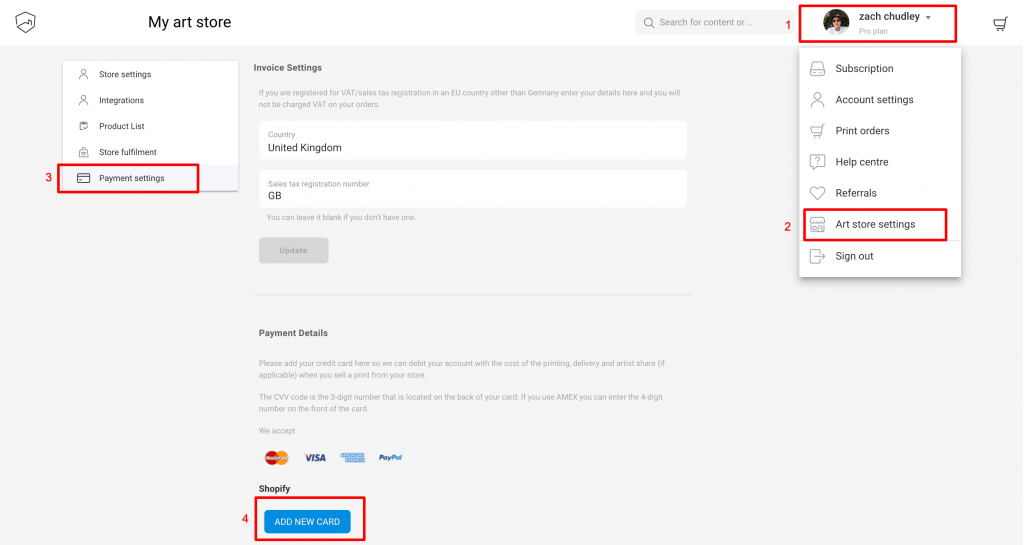
You’ll need to add a bank card to your creativehub account for us to be able to take this payment.
To do this, click your profile icon in the top right of the page and select ‘Art store settings’ from the drop down options.
Next, click ‘Payment settings’ on the left hand side menu.
Step 7: Drive traffic to your store
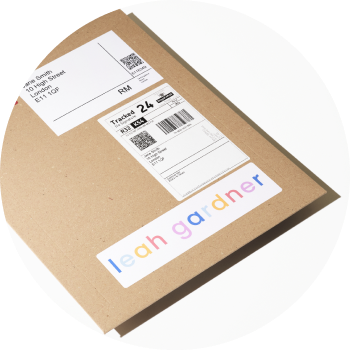
Great, you’re all set up with your new online art store! When a print sells, we’ll handle fulfillment and ship direct to your customer within 2-5 working days.
Then it’s time to start thinking about driving traffic to your online store.