Upload your signature & branding
First you need to add your artist name, signature & logo which we use to populate your certificate of authenticity. Here is how you can do that:
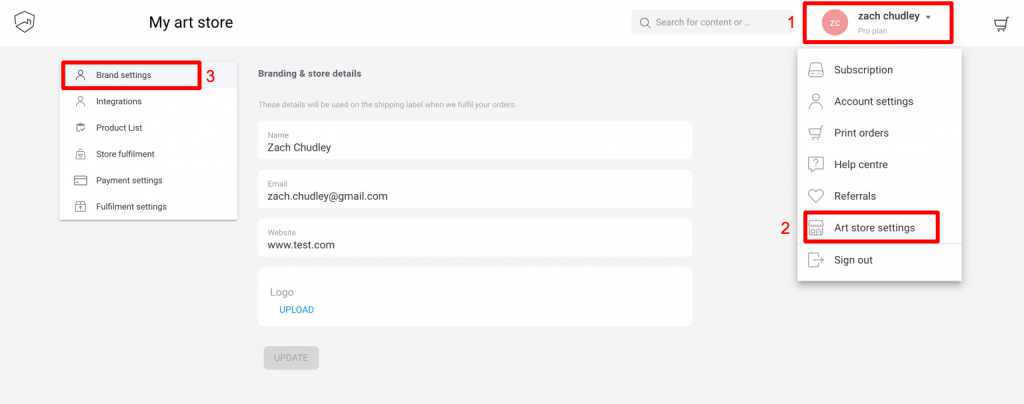
- Click on your name/profile icon in the top right corner of the creativehub homepage
- Select ‘Art store settings’ from the drop down
- You will be taken to the ‘My Art Store’ page. Select ‘Brand settings’ from the left-hand side menu
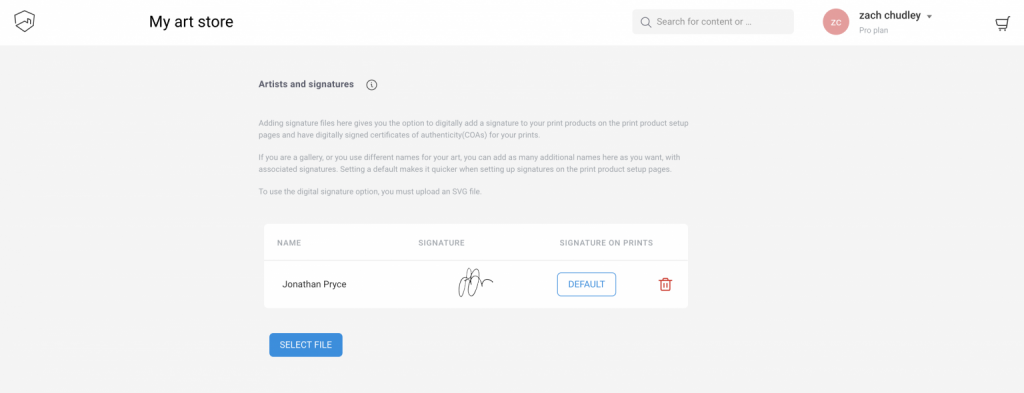
- Scroll down the page until you see the ‘Artists and signatures’ section.
- Upload your signature and save your artist name
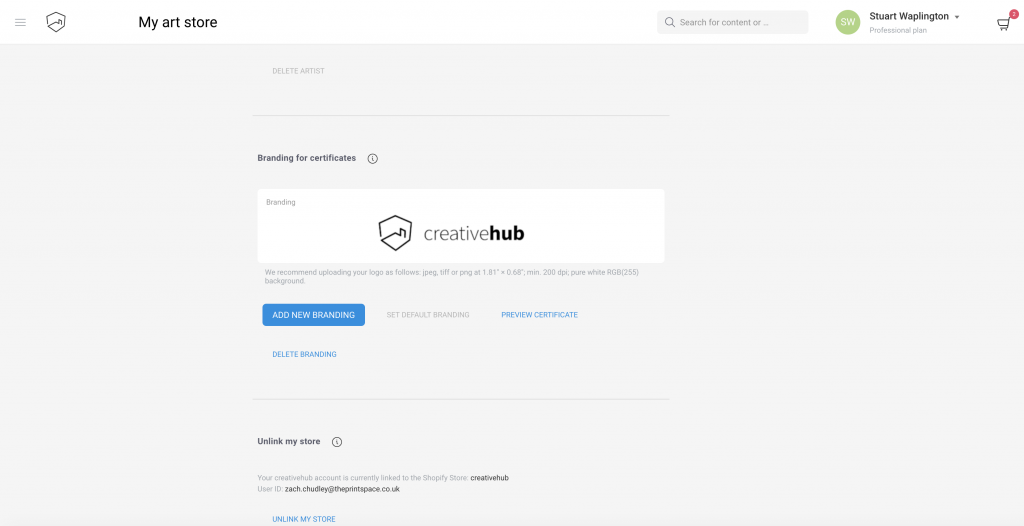
6. Next, scroll down to the ‘Branding for certificates’ section at the bottom of the page
7. Upload your logo here
The below screen shows the creativehub logo as an example:
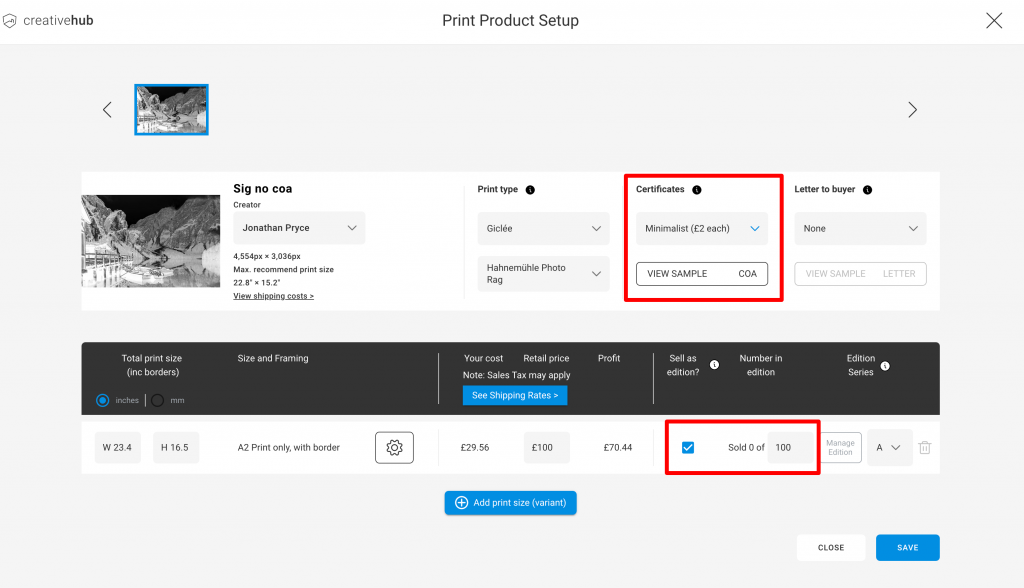
Add certificate authenticity (limited editions)
Once you have added your branding details, you need to choose your preferred COA design and apply it to your products. There are 6 design options. You can learn about them here.
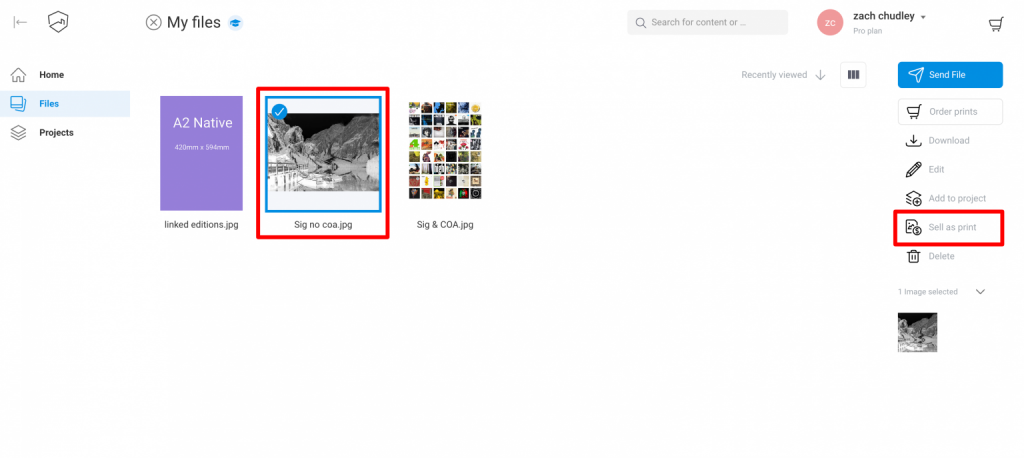
To do this you first need to create or edit an existing product variant by selecting an image in your creativehub account, and clicking sell as print.
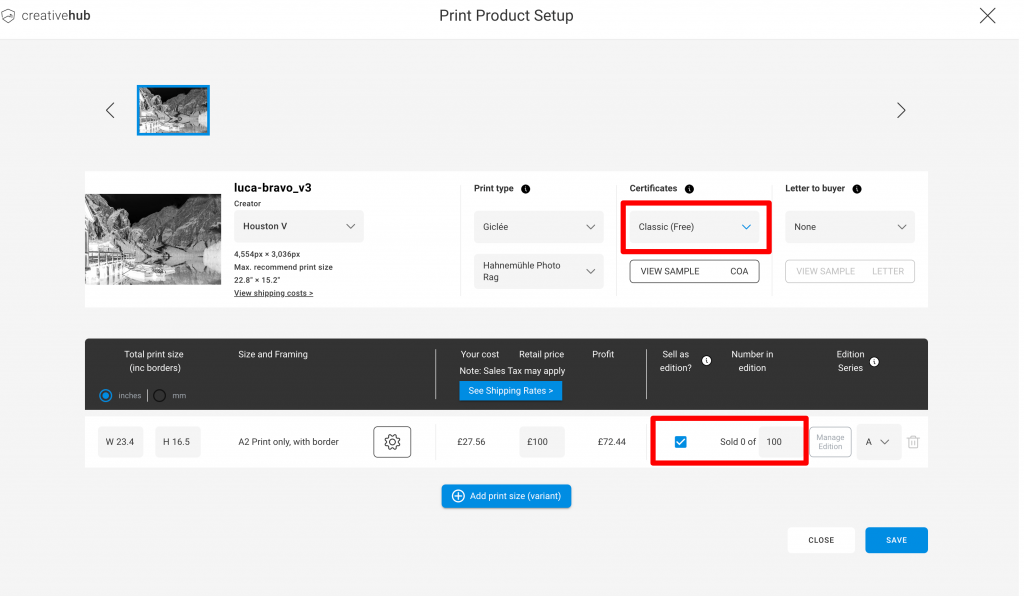
Now you are on screen where you create print products, ready for sale in your store. You add sizes by clicking ‘add print size’. When you click add print you can select the size of print you want to sell, whether you want a border or a frame.
Next, activate the ‘sell as edition’ option and save your edition size. Then choose your certificate design from the dropdown menu. When you have made your edits click save.
Add certificate authenticity (open editions)
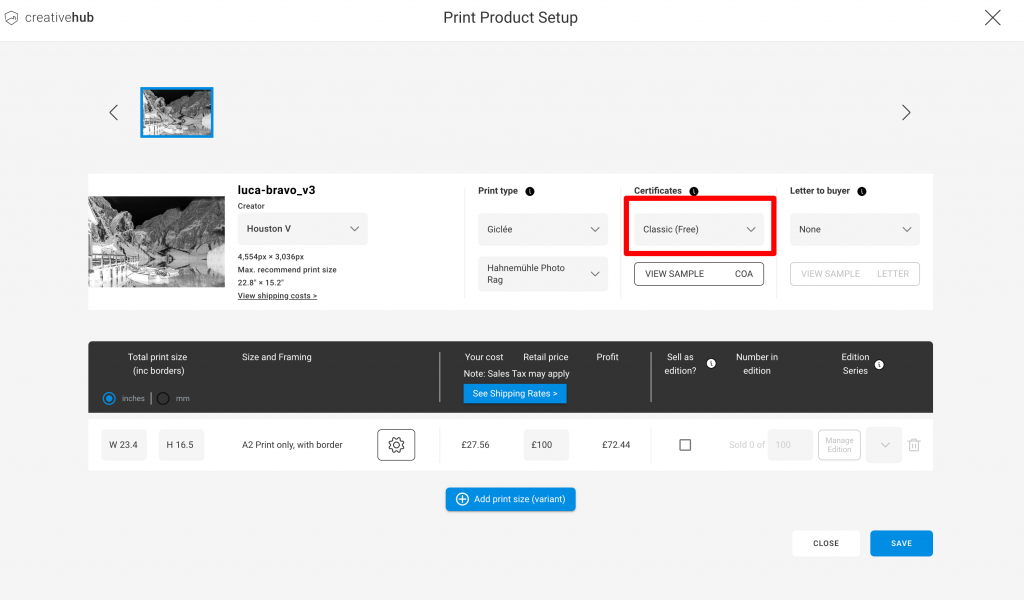
If your product variant is not being sold as a limited edition, i.e an open edition, then you can still use the certificate of authenticity feature.
To do this, once you have setup a print product, choose your certificate design from the dropdown menu. When you have made your edits click save.
NOTE: When you have made your selection, you must download one of your certificates to test that you are happy with how it looks. To do that, click ‘manage editions’ and tick one to download. To re-stock, untick the box and save.