Learn how to apply sales settings to your products such as size, price, paper type and limited edition settings, so they can be sold in your e-commerce store.
Step 1: Login and upload your files
First, login to your creativehub account or sign up for your free account.
Now upload your files. To do this, click the ‘Upload’ button located on the right hand side menu or simply drag and drop your files onto the creativehub browser window.
For help on files types and sizes, read this.

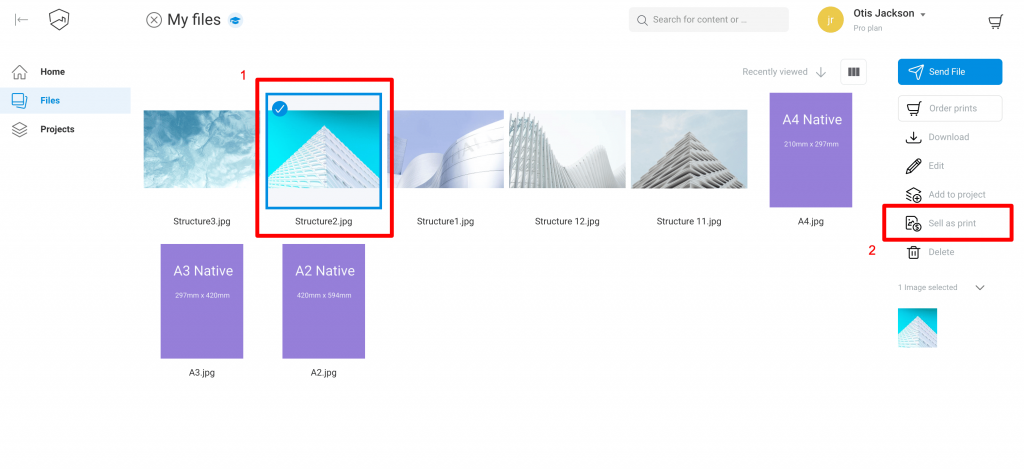
Step 2: Select the files you want to sell
Click the ‘Files’ option located on the left hand side menu and then select the file or files you want to sell as print products on your website by using the tick box in the top left of each file preview.
Then click the ‘Sell as print’ option located on the righthand side menu.
Choose your price, size and paper type settings
You are now on the ‘Print product setup’ page.
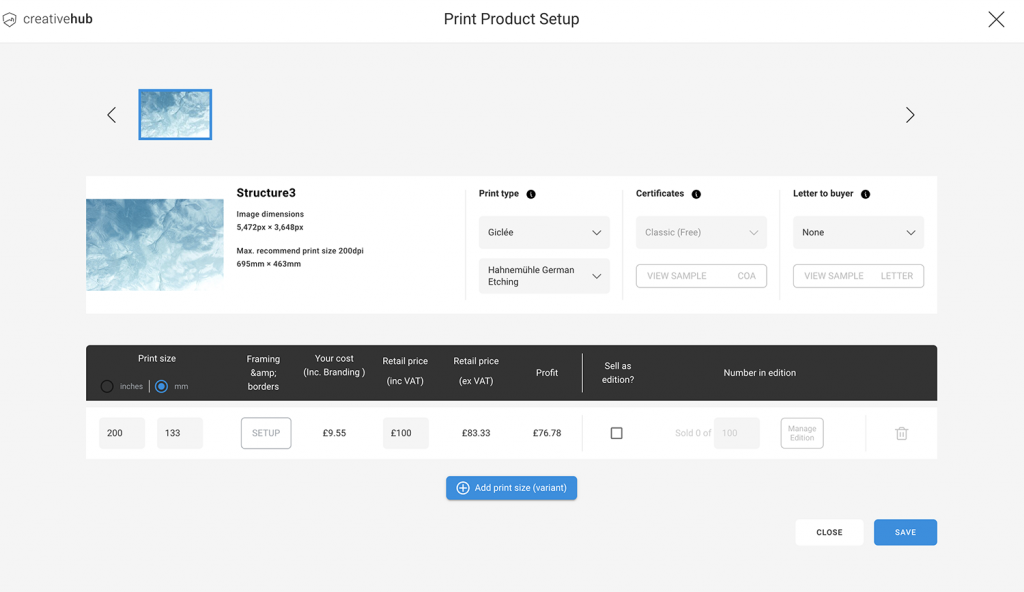
To set up your products click the ‘+ Add print size’ button. Then apply the following settings:
- Set your size
Both Imperial and Metric measurements are available. - Set your price
You can preview the cost for the different sizes and how much the net profit will be once the print cost is deducted. - Limited editions (optional)
If you want to offer your print as a limited edition, tick the box and apply the desired number of editions. - Set the paper type
Choose from our range of 11 professional grade art and photo papers. We also offer a single premium canvas option. Click here for more information on our papers. - Save your settings
If you have multiple images selected, clicking ‘Save’ will take you to the next image to repeat the process. If you want to apply your settings in bulk, select the tick box offering this option, found below the ‘Paper type’ dropdown menu.
If you want to set up your products to be sold with frames, then read this article.